Congratulations! By signing up for Labfolder’s electronic laboratory notebook (also referred to as an ELN, or electronic notebook), you have taken the first step towards a paperless lab. At any time (and any place) you can access your Labfolder account via eln.labfolder.com
Ready to begin the journey of optimizing your data, improving collaboration, effortlessly complying with laboratory standards, and generally making life in the lab easier? Let’s get started with a little introduction to set up your ELN for success.
Structure of data
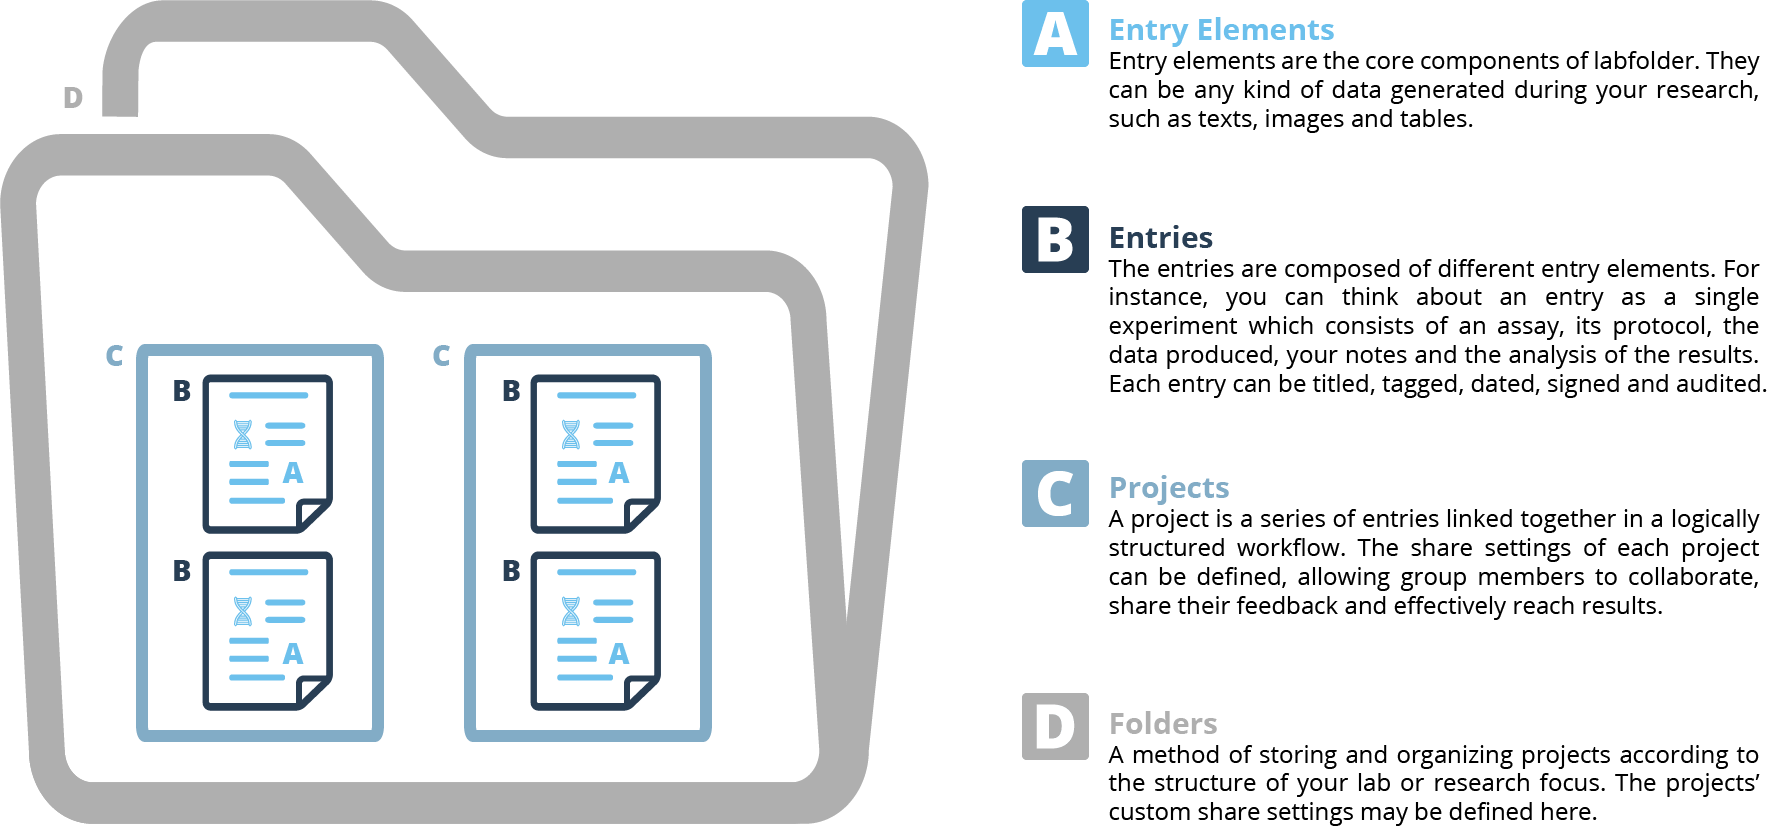
The data in Labfolder are organized in a hierarchical structure, starting from Entry Elements to Entries, Projects and Folders. You can customize each organization level to fit your own research requirements. The picture below depicts the hierarchical structure of data in Labfolder.
Labfolder follows the natural structure of your research. Mimicking the paper notebook, our ELN includes different Entry Elements that you can use for different pieces of your data (text, tables, images, etc…). These elements compose Entries that serve as a complete annotation for a certain step or experimental procedure.
Each entry belongs to a specific Project, the same way it happens with the classic notebook and you can filter for each individual project which gives you the perfect overview of everything that has been done in it.
If several projects work on the same topic to form a bigger picture you can organize them in Folders, making it easy to get a better structure your entire research.

Start with your own research
Create your first project/folder
To get started with Labfolder, you’ll need to create your first project and folder. You can organize your projects by creating folders and subfolders to store them. Since your workflows are primarily project-based, the platform requires you to create a project before any entries can be made. When creating a project, you’ll need to name it, select a folder to store it in, and configure the sharing settings to determine who in your group should have access. Once that’s done, you’re all set to begin your work!
- Click Projects from the left-hand navigation menu.
- Click Create Folder/Project in the top-right corner.
- You can create either projects or folders to organize and store multiple projects.
Add your first entry
Now that you have a project to store entries in, you can create your first entry. Then, you can start adding text, images, tables and upload files to get your lab notes to the next level.
- Click on your newly created project to open the notebook view.
- Click Create Entry/Use Entry Template in the top-right corner to begin creating your experiments.
Use Labfolder with your team
Once you are familiar with Labfolder, get your colleagues to join you!
Create a group
- Click Groups from the left-hand navigation menu.
- Click Create Group.
- Enter a name for your new group.
Invite your colleagues
Once your group is established, you can seamlessly invite collaborators to join your project.
From this point on, you can utilize your electronic laboratory notebook for real-time collaboration with your colleagues. They will be able to contribute their own entries, work on shared projects, create a collective repository of protocols and templates, leave comments on your data to accelerate troubleshooting, and even assign or receive tasks to streamline lab operations and enhance overall efficiency.
From this moment onwards, you can use your electronic laboratory notebook to collaborate with your colleagues in real-time. They will be able to add their own entries to common projects, create a shared repository of protocols and templates, comment on your data to speed up troubleshooting, and even assign and receive tasks to improve lab efficiency.
1 Navigate to Groups in the left-hand menu.
2 Select the group you want to add collaborators to, then click ‘Invite to Group’.
3 Enter their email address and send the invite to start your collaborative work! Add this as disclaimer –
*In the free version you can only have 1 group and invite 2 additional scientists. If you want to onboard your entire team, check out the Advanced version.
Create a collaborative project
Now that your team is set up, you can create a collaborative project. This will allow your team members to start adding entries to the project, making them visible and editable by all relevant members.
-
- Click on Projects in the navigation menu.
- Open the Share Settings from the settings menu on the right side of your project.
- Select Collaborative Editing and save the setting.
- You’re now ready to collaborate! All members of your team can view, create, and edit entries in the project, including those created by other members.
*In the free version you can only have 1 group and invite 2 additional scientists. If you want to onboard your entire team, check out the Advanced version