All laboratories have different sorts of inventory lists for plasmids, antibodies, chemicals, bacterial stocks, etc. In your electronic notebook, you can create such inventories in the Labregister.
Labregister is a highly customizable tool: You can create as many categories and items as you need. Furthermore, you can also define your items’ attributes. In this guide we will show you how to create this very common inventory structure:
- Primary antibodies (category)
- ATP13A2 (item)
- Clonality (attribute)
- Lot number (attribute)
- Application (attribute)
- Alpha-synuclein (item)
- ATP13A2 (item)
- Secondary antibodies (category)
Create your inventory
Labregister allows you to incorporate your inventory lists and directly link them to your laboratory notes. You can create material lists by manually adding them or uploading existing inventories.
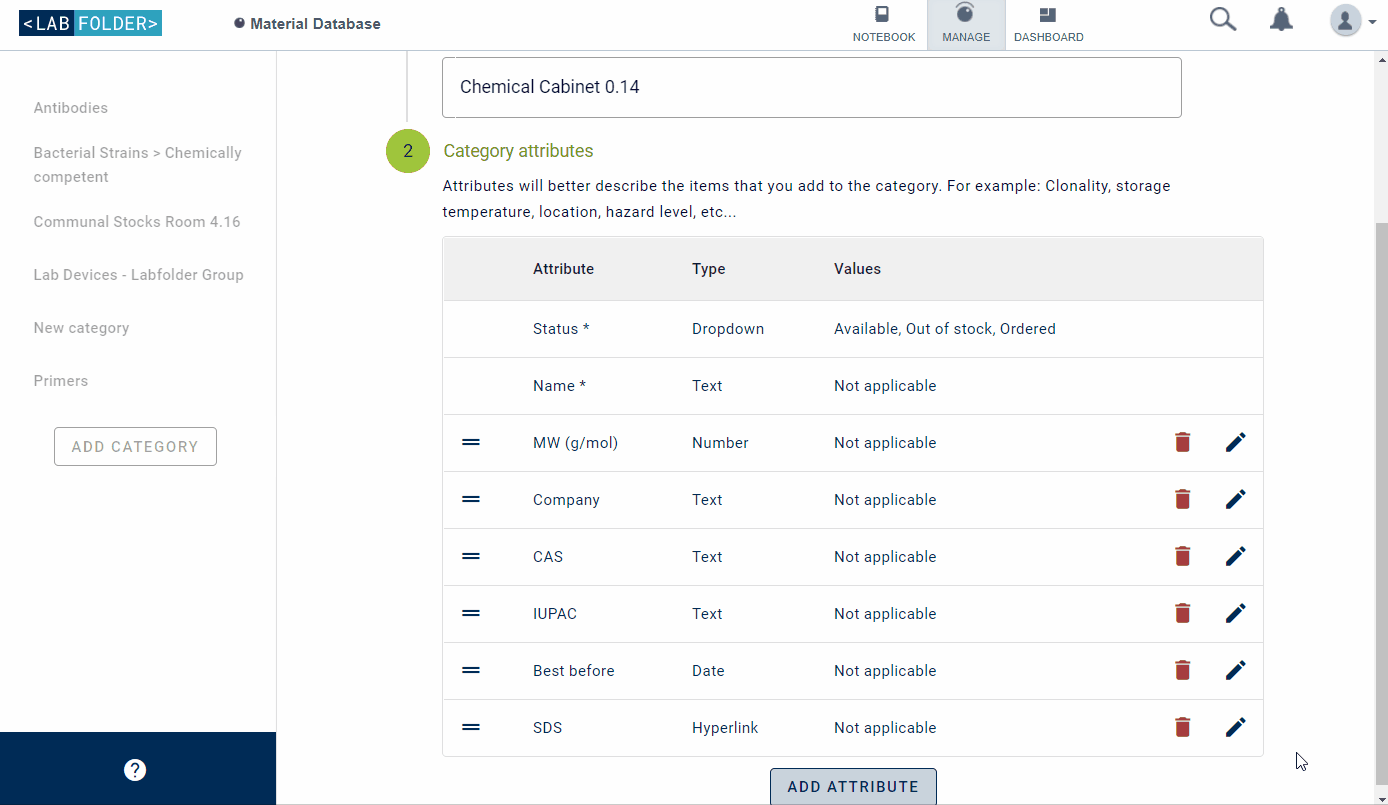
Add categories with attributes
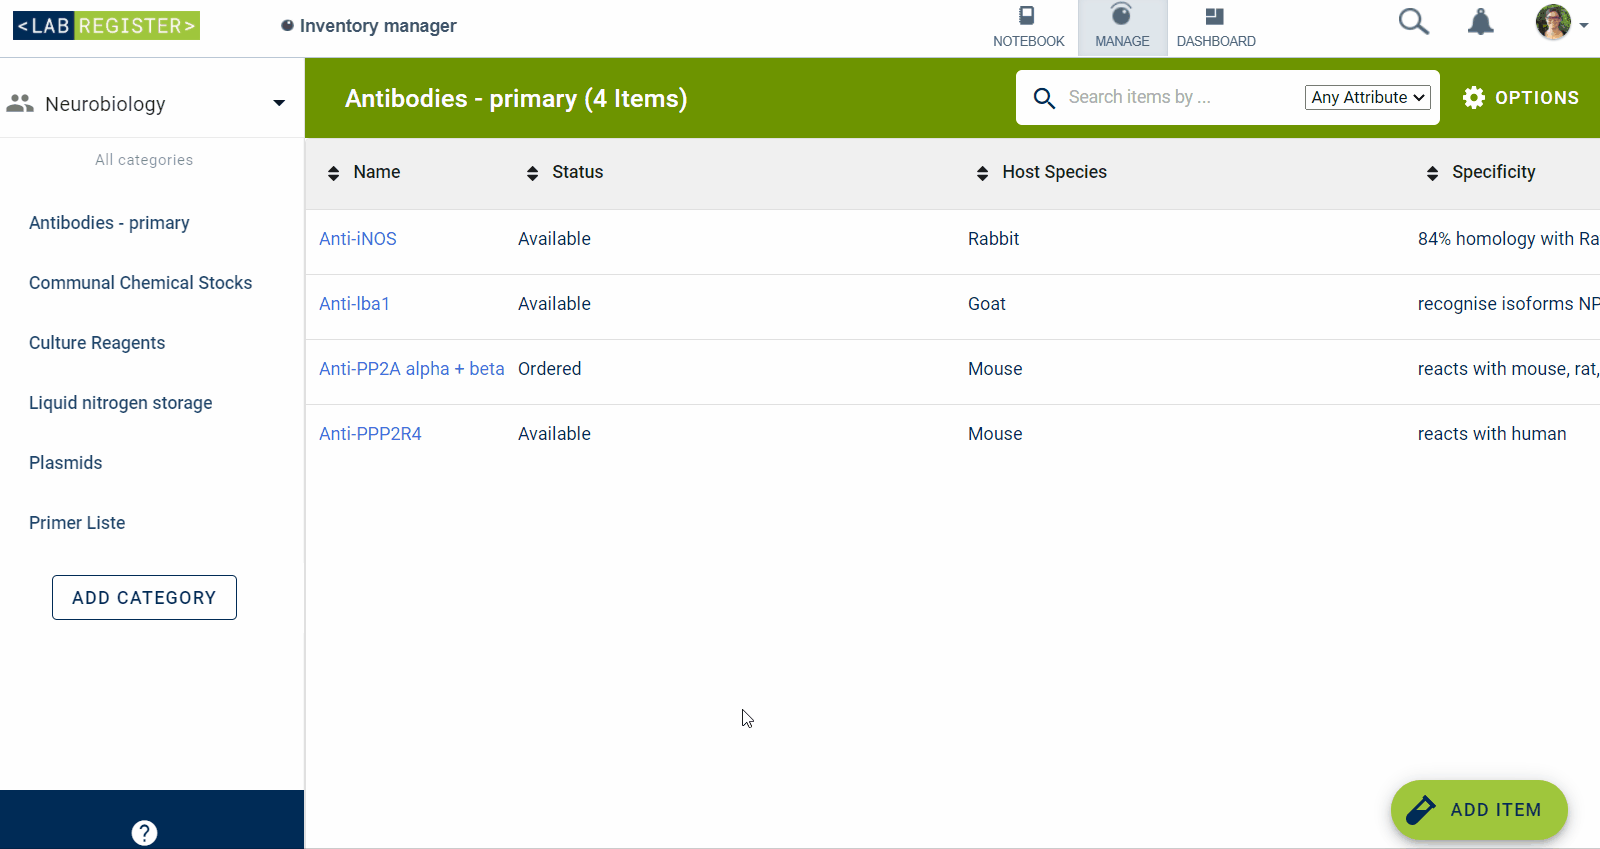
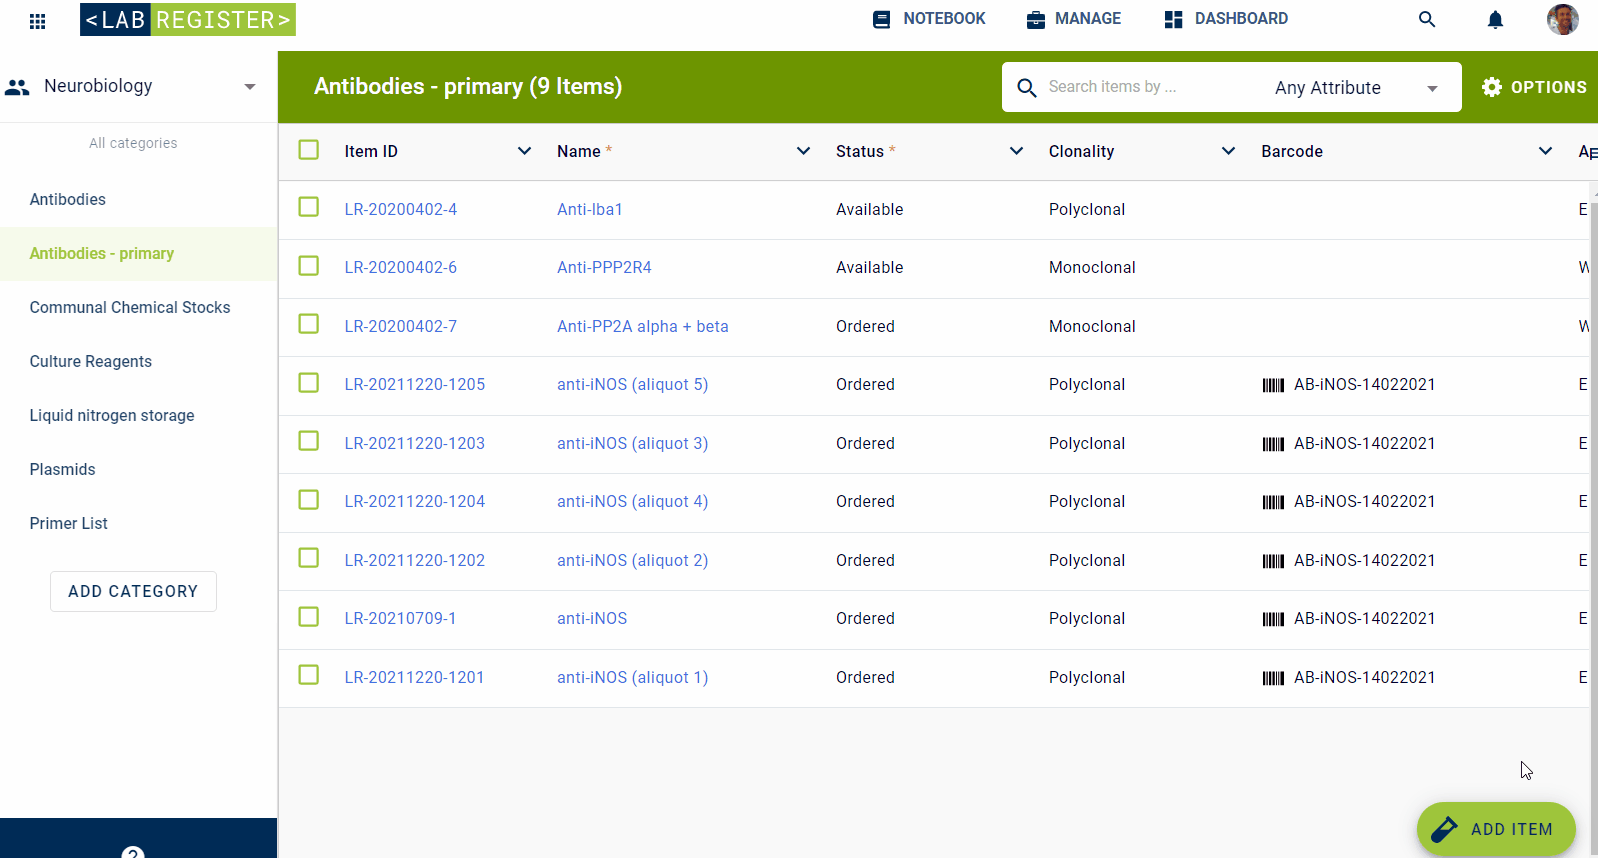
Within Labregister, you are able to organize your inventory in categories and assign attributes to further describe each item.
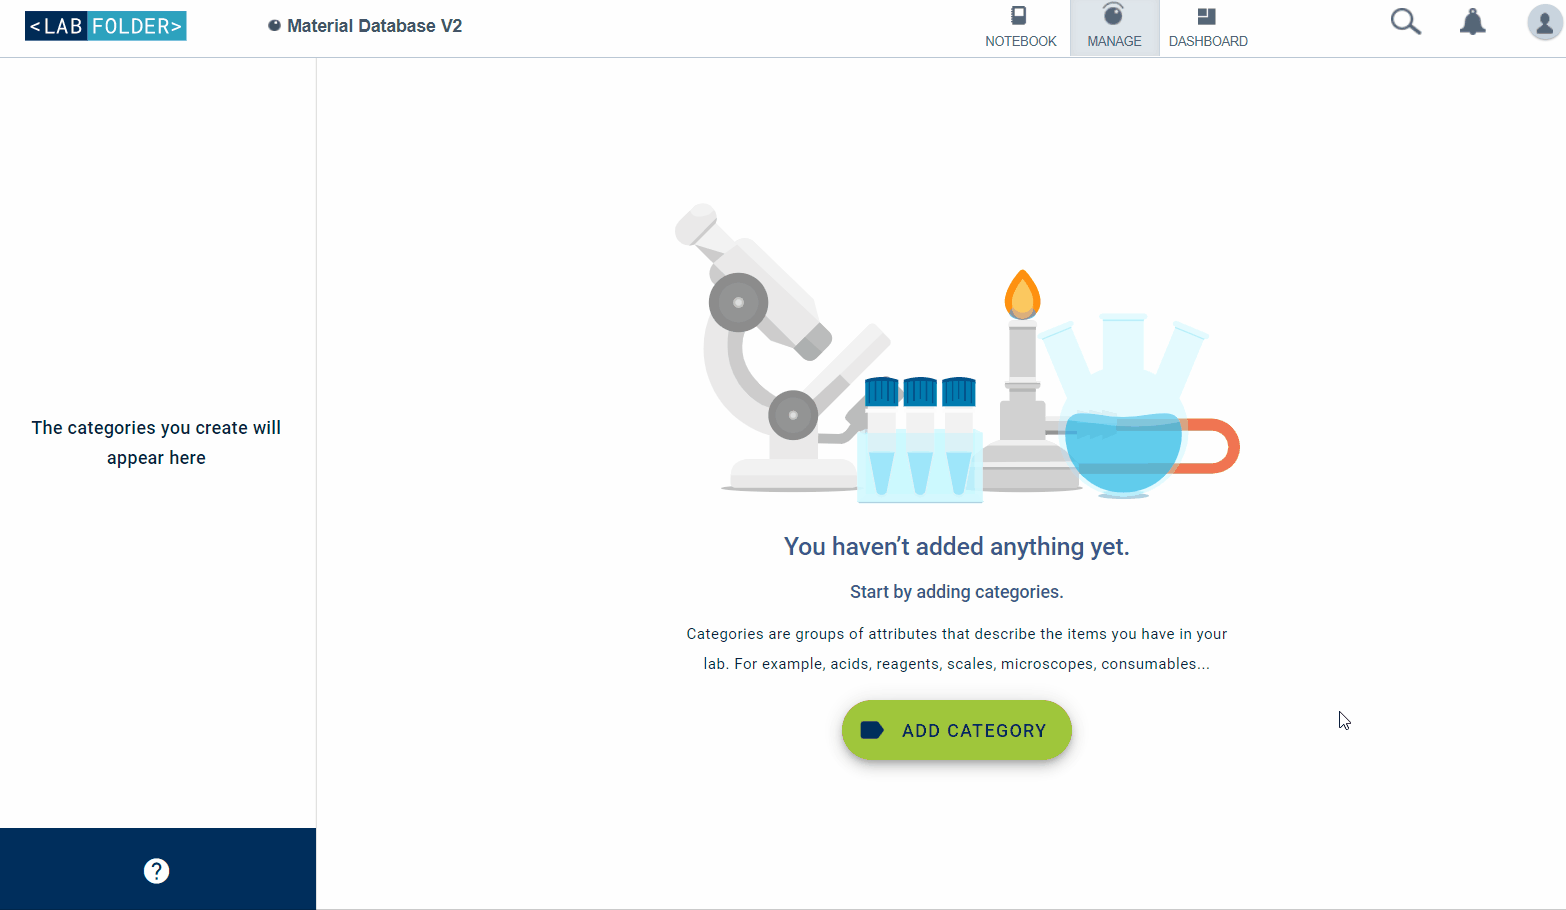
- Click the
Add categorybutton. - Give the category a name and define the attributes you want to be associated with it.
- Click
Saveand you are ready to add items.
Insert the first item
Once you have created a Category, you can start adding your items.
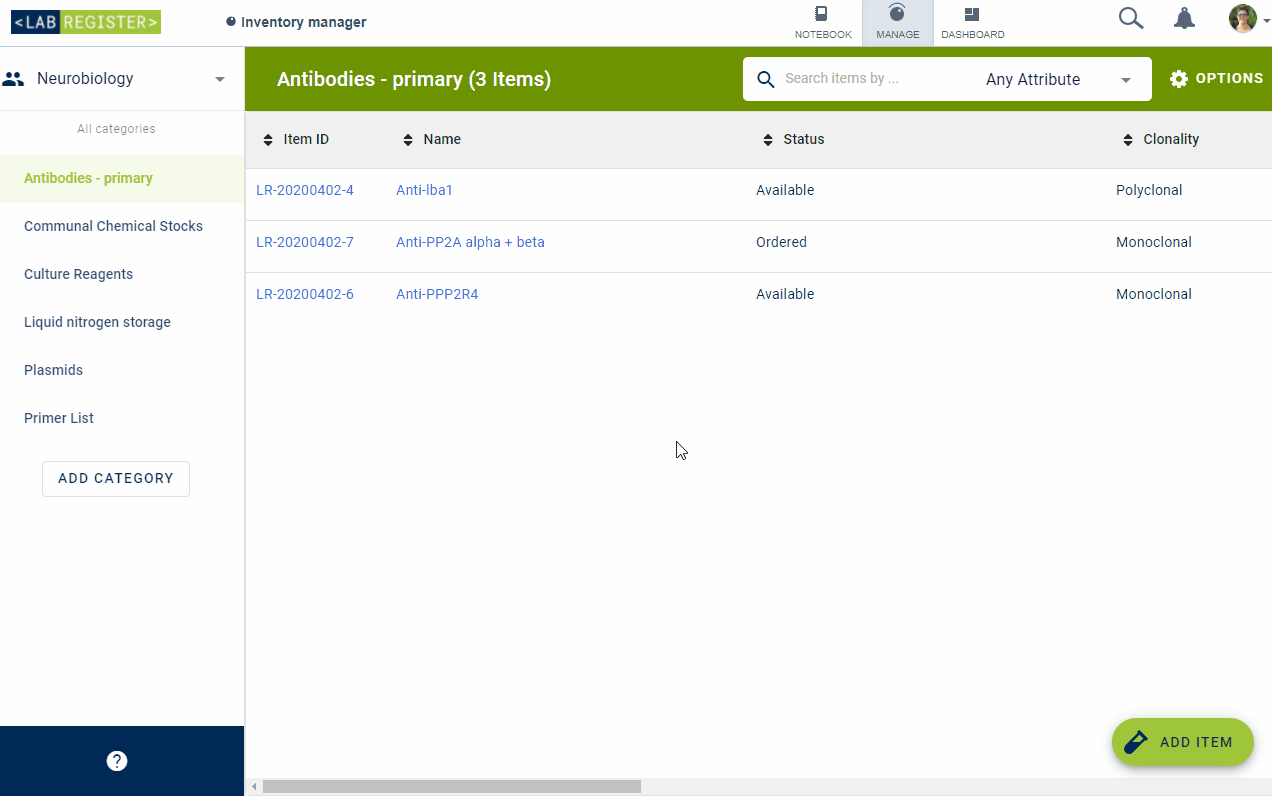
- Click the
Add Itembutton. - Give your item a name and fill in the attribute fields.
- Click
Saveand you are done.
Upload existing inventory lists
To ensure an error free import, your Excel inventory file has to be pre-formatted, so that the inventory items from the Excel worksheet can be matched to a corresponding Labregister category.
For a comprehensive list of formatting options please refer to our in-depth Helpdesk article.
- Include a header row in your file! During the import process, column headers of the Excel file will match to the category’s attributes in Labregister. Where needed, you can manually map your column headers to attributes.
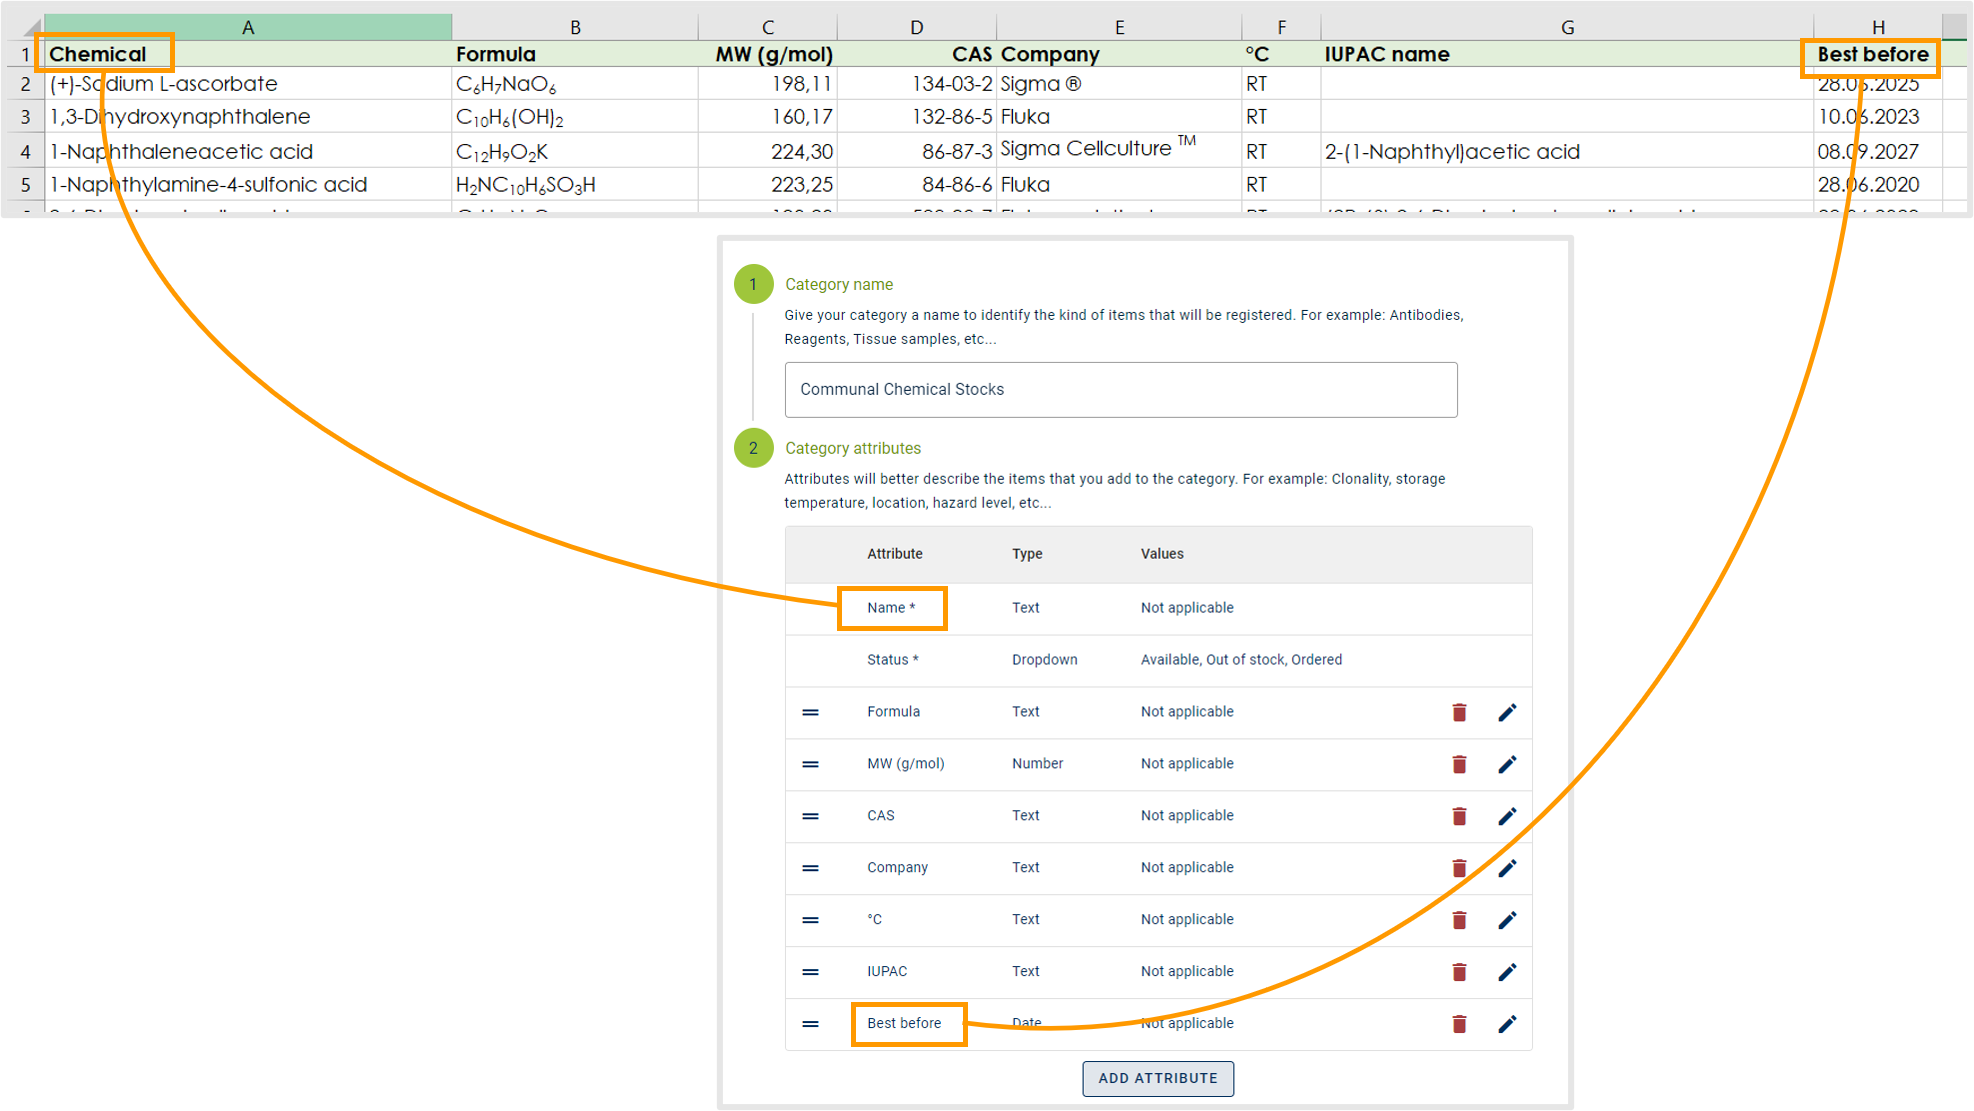
Once you have created a Category, you can start adding your items.
- Click the
Import from Excelbutton. - Select the file you wish to import
- Choose the appropriate worksheet and match existing column from the Excel to category attributes.
- Click
uploadand you will now be able to view and edit the inventory items.
Search Across all Items & Categories
Within Labregister, you are able to search for specific items (or even categories) using the search bar located at the top of the page. You can search across all categories and even use special characters in your search e.g. Ω, β, ä, ö.
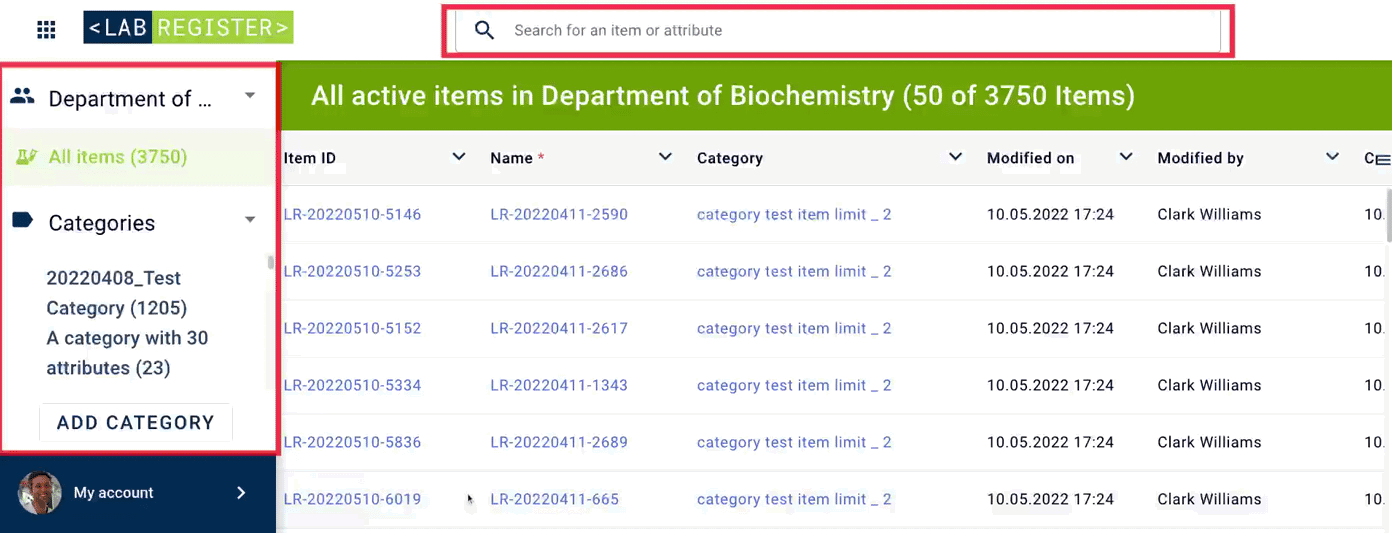
- Simply type in the item or attribute you’re looking for in the search bar, and then combine it with wildcard operators to filter your search further:
- Then simply press
enterto perform the search orescto clear the search. - Once you’ve performed your search you will be able to see all the matches for each category on the left hand side of the page. Alternatively, if no search is applied you will just see the total number of items within each category.
Use ?, to match any single character
Use *, to match zero or more characters, including an empty one
Use \, before ?, or *, to disable the wildcard operator
Utilize Barcodes
If you would like to track and manage your lab reagents even more efficiently, benefit from the possibility to add 1D or 2D barcodes to each of your materials. With Labregister you can add, edit, visualize and print the respective barcode of your inventory item.
- Navigate to
Options>Category Attributesto add a new attribute to existing inventory lists. - Enter
Editin order to define new attributes. - Give your attribute a name and choose
Barcode. - Select the barcode type to be displayed as Code 128 or Data Matrix.
- Click the
Saveicon to save any changes. - Choosing an item from your inventory, allows you to fill the number value for the newly added barcode attribute.
Print Barcodes
An exported inventory list of Labregister contains the barcode value information but not the barcode image. Additionally, images of a barcode can be printed individually for each item:
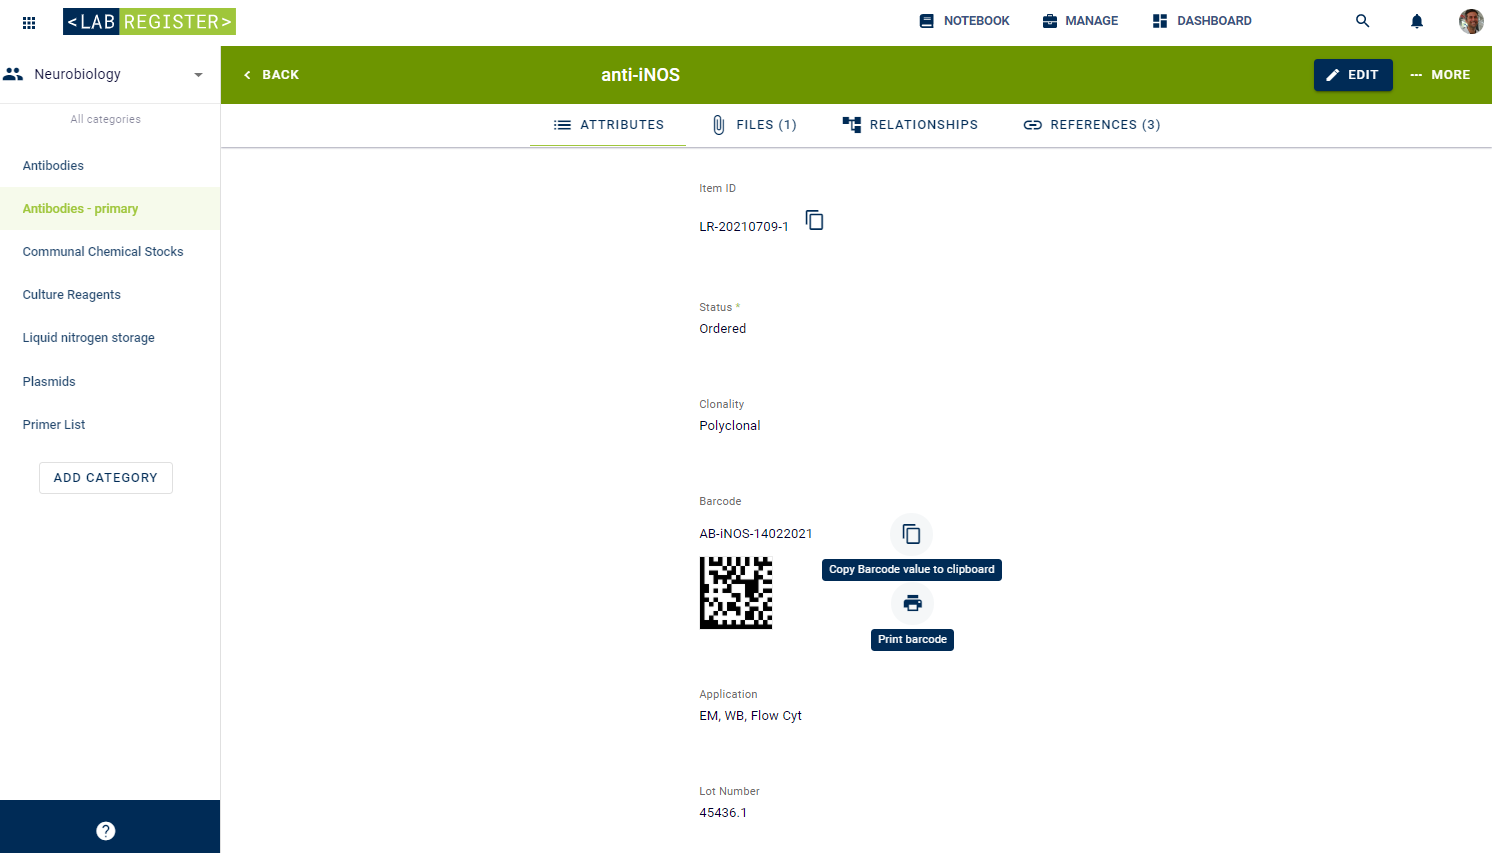
- Open the category you would like to print barcodes from and select an item by clicking on the item name.
- Next to the barcode image, click on the print icon.
- Choose to either print the barcode directly or to save the barcode image as PDF.
Build item relationships
Defining the relationship between material items is important to achieve full traceability. This not only concerns data integrity but also quality management, where for example materials need to be tracked that have been used to produce a certain medical product.
- Open the category you would like to modify and select an item by clicking on the item name.
- Choose to
Editan item, more specifically via theRelationshiptab. - Choose to either
Add as childrenor toAdd as parents. - Pick one or multiple relevant items from the given list.
- Press
Saveto change your modifications.
Adjust access rights
Each laboratory has a set of common stocks that are shared between multiple people. By using Labregister you can also select who from your group you wish to share the inventory with and further specify the extent of the access rights. Labfolder distinguishes between 4 different roles:
- Owner: Is able to view, share, edit, and delete the category and every item inside.
- Manager: Is able to view, edit, and delete categories and their items inside.
- Editor: Is able to view the category and can create, edit, and delete items inside.
- Viewer: Is able to view items inside a category.

- In your category, click the
Optionsicon in the top right hand corner. - Choose to manage the category permissions.
- Select the team members you want to share with.
- Click
Saveand they will now be able to view and edit the database.
Export your inventory
With Labregister you can export each inventory list, for it to be stored as an Excel spreadsheet for your own records. This provides an overview of the stocks you had in your laboratory at that particular time.
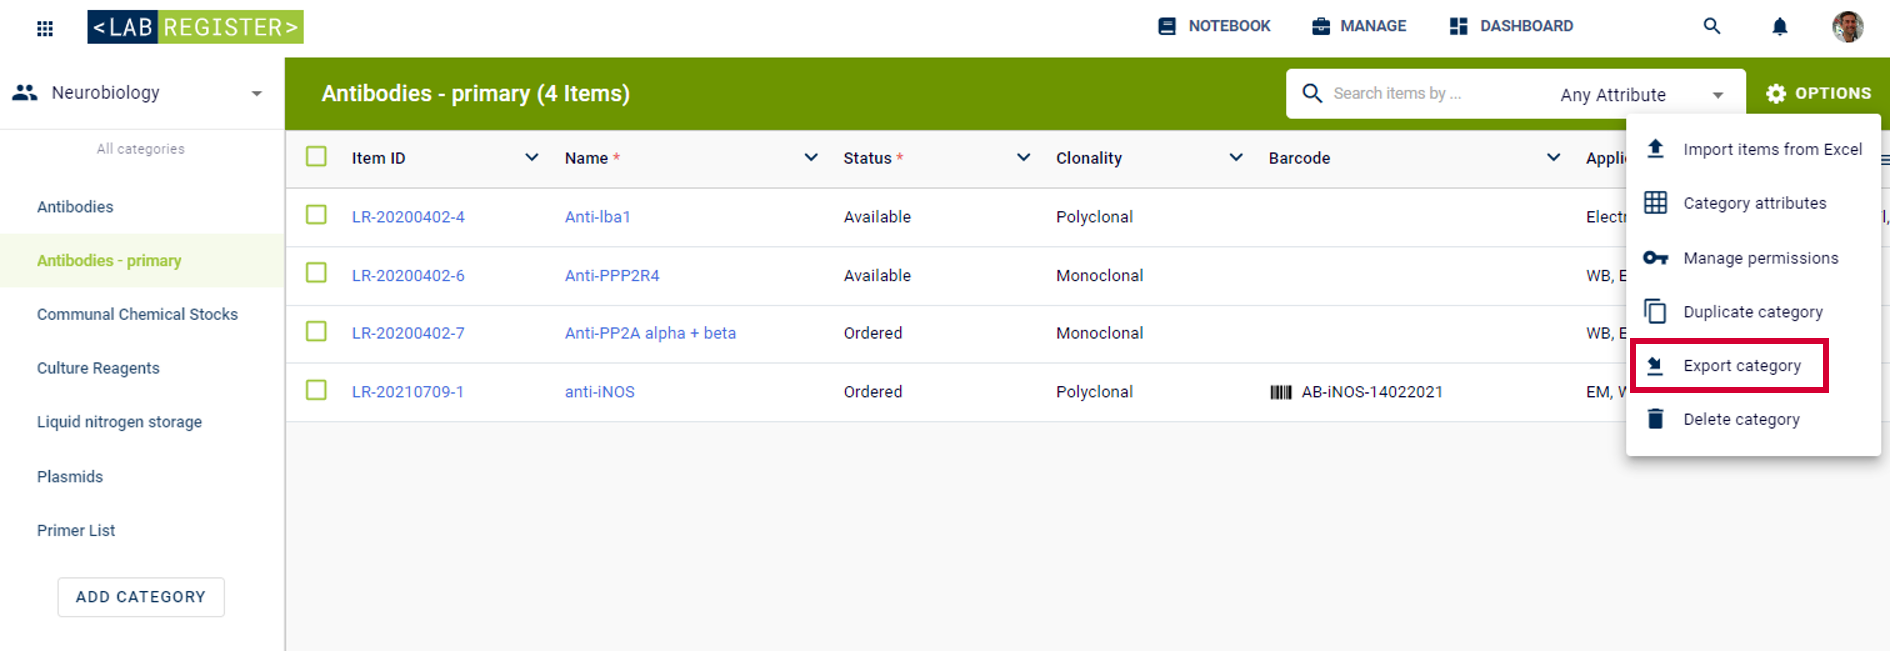
- In your category, click the
Optionsicon in the top right hand corner. - Choose
Export category. - After confirmation, the export file will automatically start.
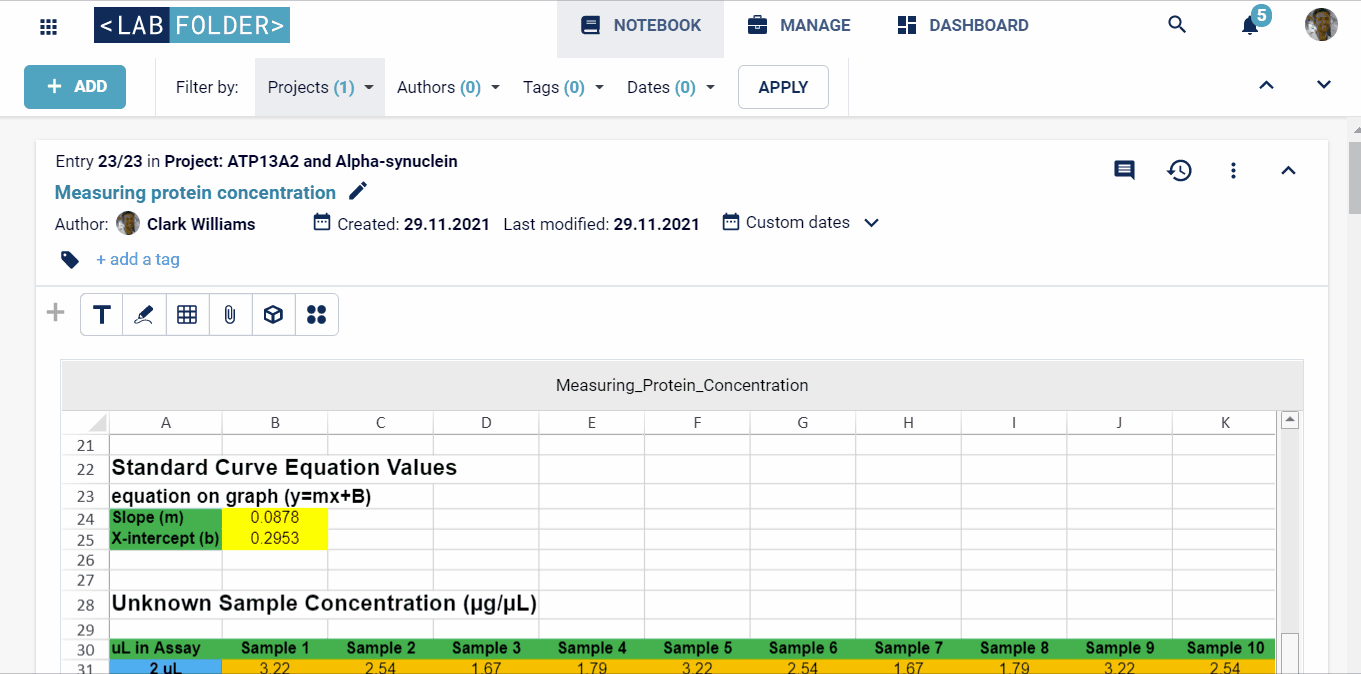
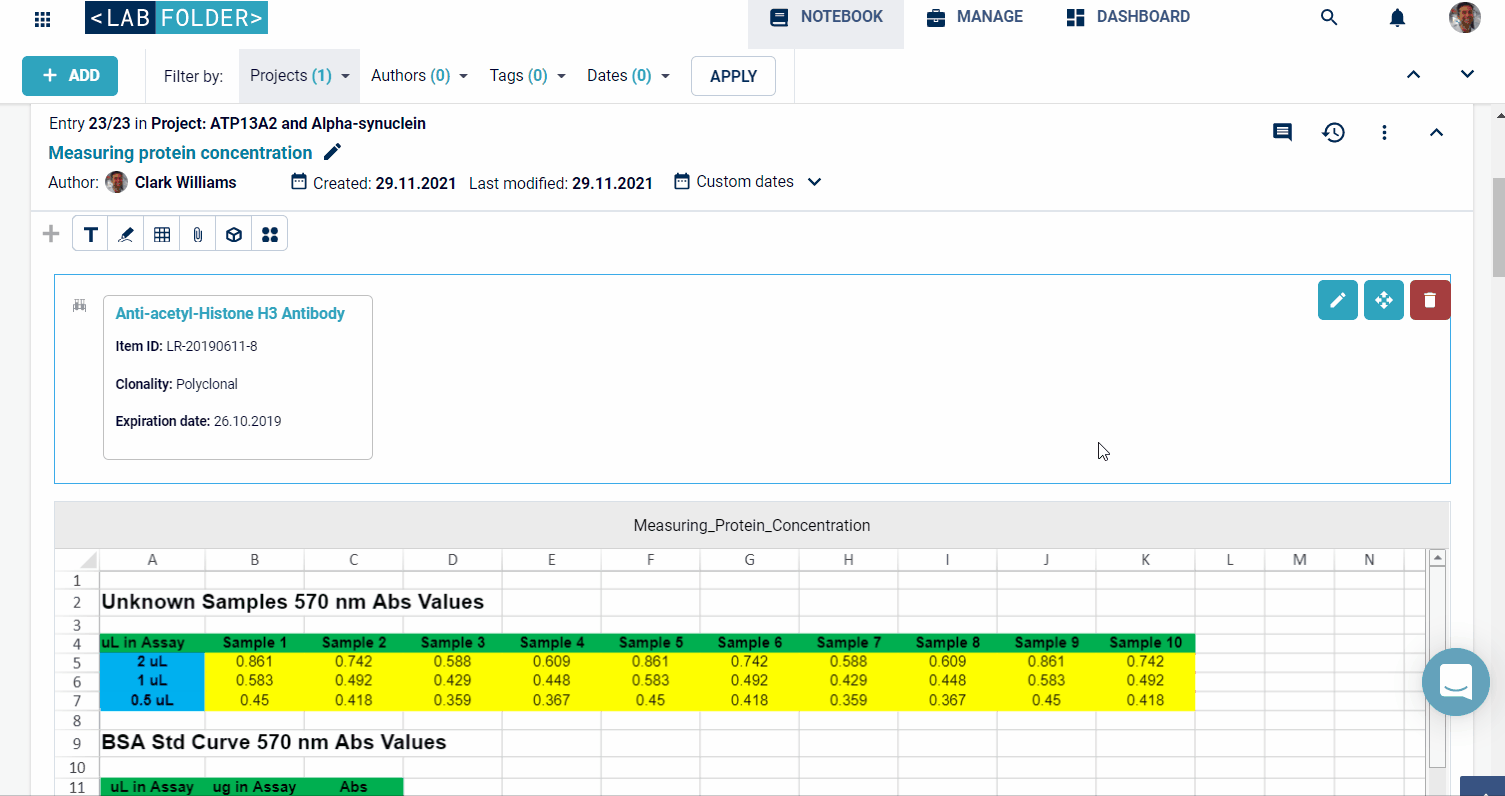
Connect your ELN and Labregister
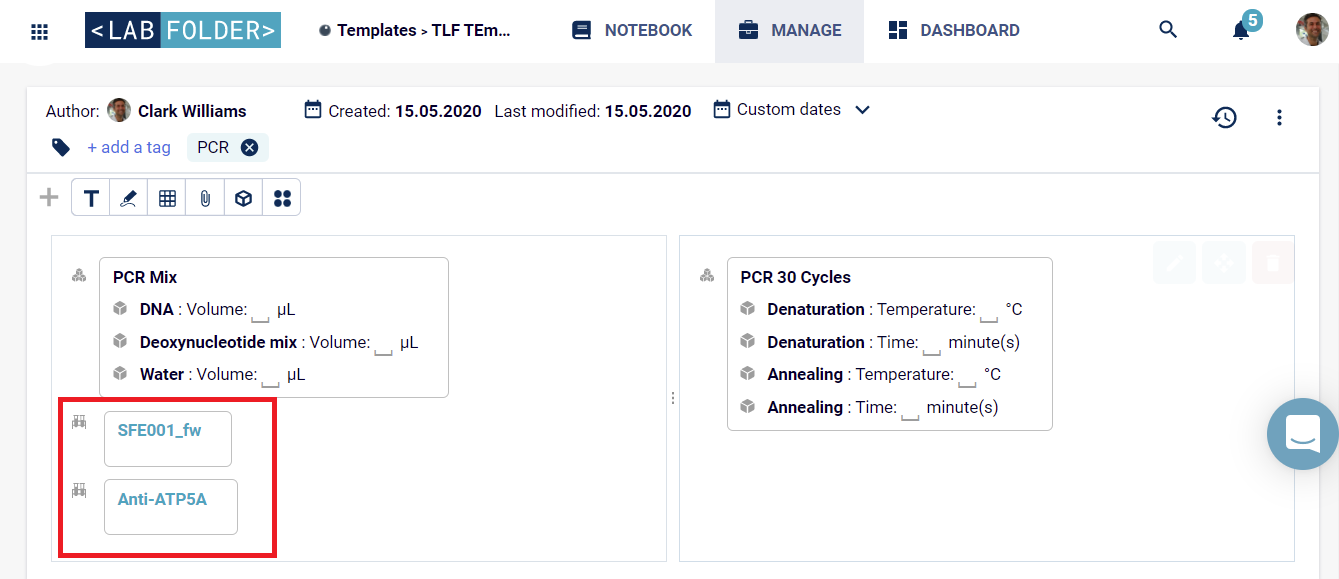
Naturally, in research you want to link certain experiments to a specific antibody or other inventory items that you used. You can use Labregister Items to create the connection between your electronic lab notes and Labregister.
- In your
Notebook, click on theData Elementsicon. - Select
Labregister Item. - Search for the name of the inventory item or the respective item ID.
- Select the desired item.
- Save the block.
Use the Labregister Item
When you reference something from your inventory, a hyperlink to Labregister is created.
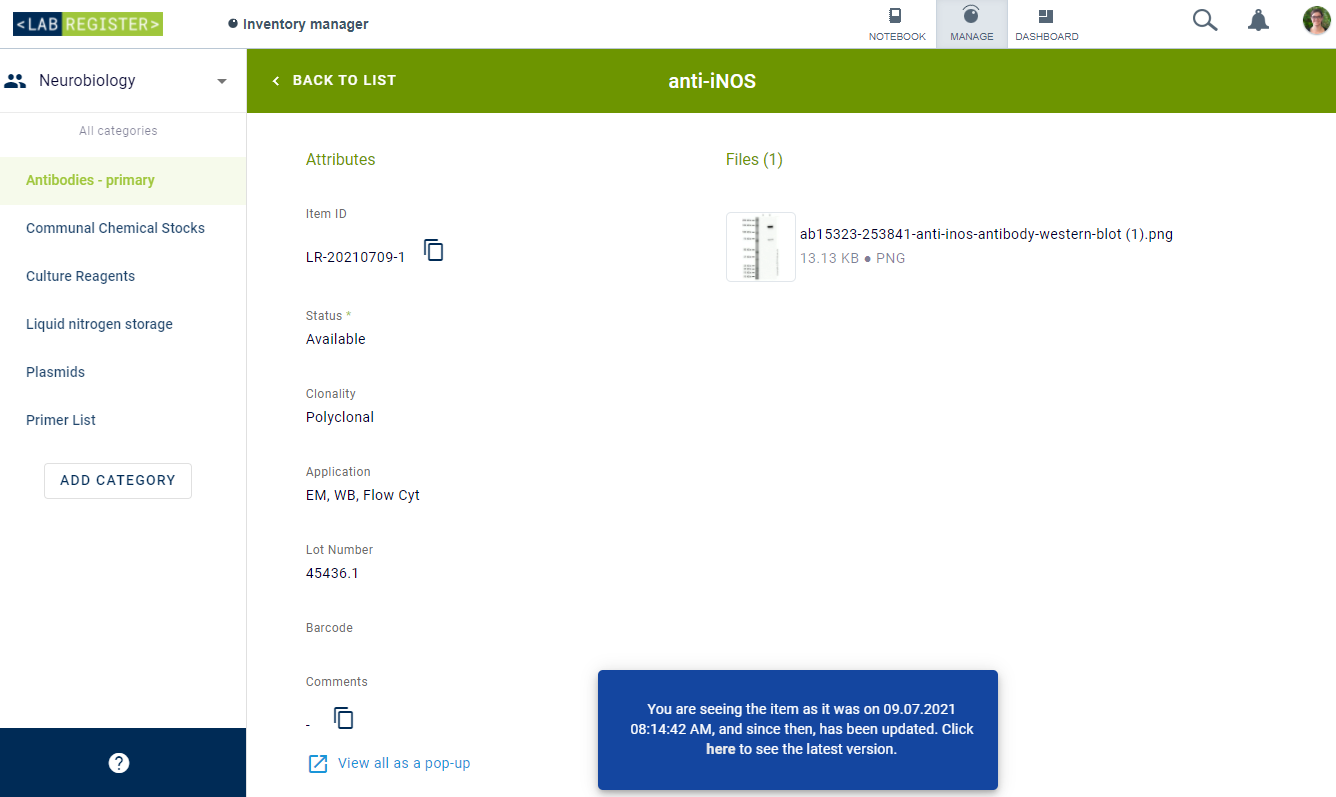
Change availability
All your reagents in the lab have a life cycle that goes from ordered to available to out of stock. These exact same statuses can be applied to your items in the inventory, so from your Labfolder ELN you will always know if the specific antibody you need is in stock or if someone else finished it.
In order to let people know that a reagent ran out, simply follow these steps:
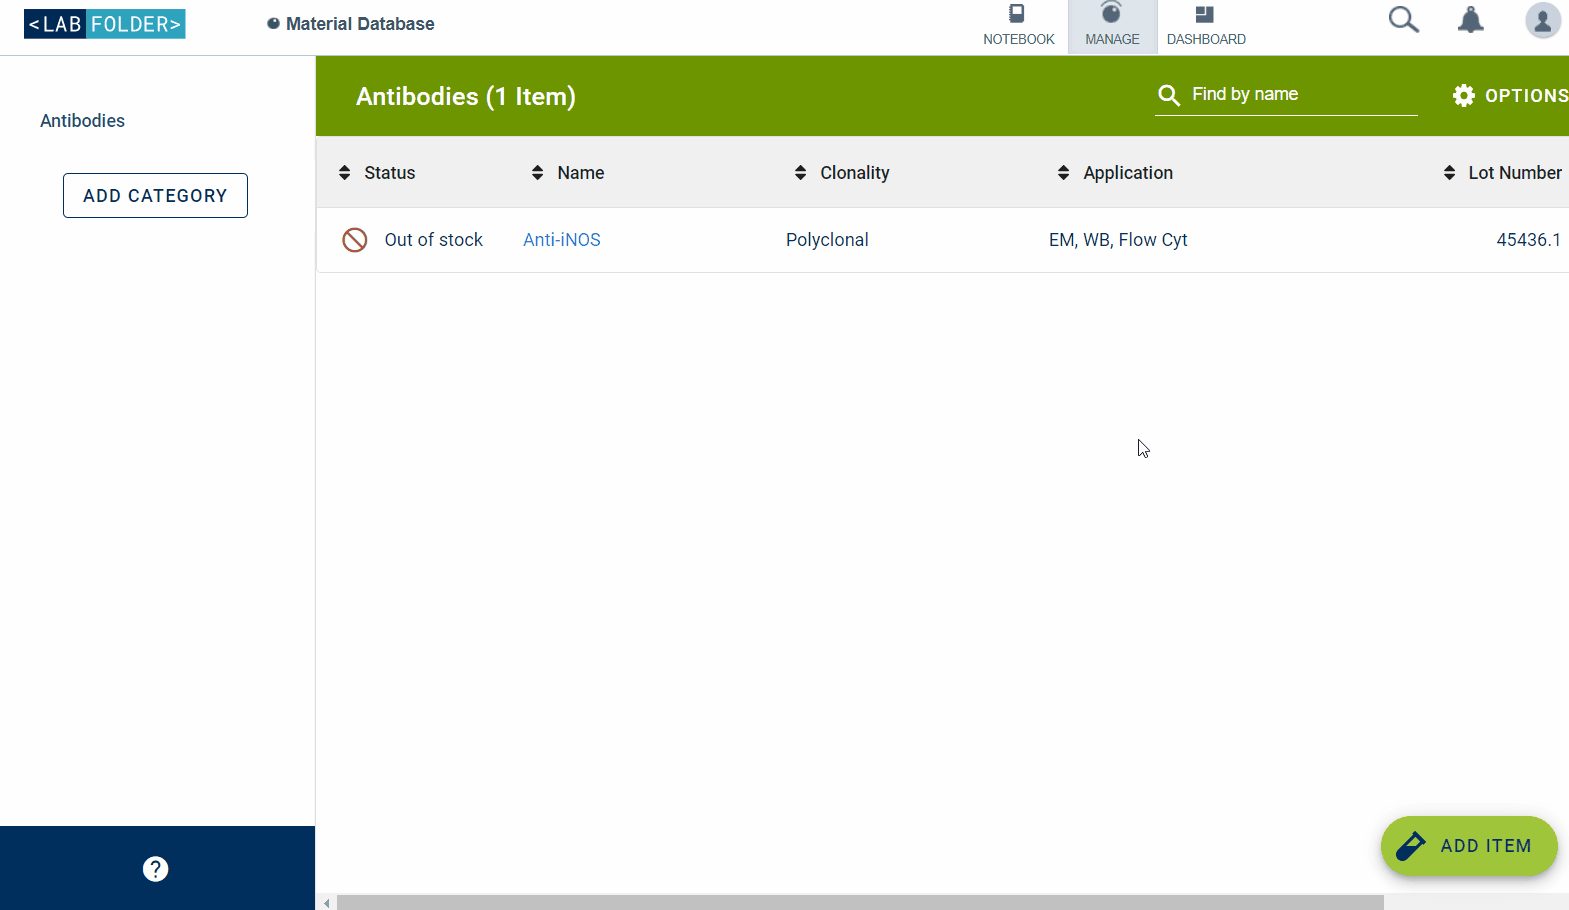
- Go to
Manage>Labregister. - Select the
Categoryand the specificItemyou want to edit. - Click
Editand select the status from a drop down menu. - Press
Save.
![]() TIP: You can also use these steps to update any information regarding your item.
TIP: You can also use these steps to update any information regarding your item.
Update your templates
Data Elements are also extremely useful for your templates. You can duplicate your entire protocol with an empty amount for the Data Elements that can be filled every time someone uses the template.
Versioning
All changes made to the items in Labregister are recorded. Although you will not have a visible history or audit trail, you can be sure that the changes are documented. This becomes obvious when you are using Labregister Items: The created hyperlink is versioned, which means that it will always refer to the original inventory entry. But when the inventory gets updates, you will see a note at the bottom of the page saying that a newer version of the item is available.
Next: How to ensure data integrity and Security with Labfolder